
Transform your outdoor spaces into inviting havens with these inspiring DIY projects. Whether you’re seeking to enhance curb appeal with a DIY patio makeover, create a relaxing retreat with a DIY garden, or build functional additions like a DIY outdoor kitchen, this article provides comprehensive guides and easy-to-follow instructions for various skill levels. Unleash your creativity and discover the joy of outdoor renovation with practical and stylish DIY solutions for stunning results. Learn how to maximize your outdoor living areas with budget-friendly DIY upgrades, making your home a true reflection of your personal style.
Painted Mason Jar Lanterns
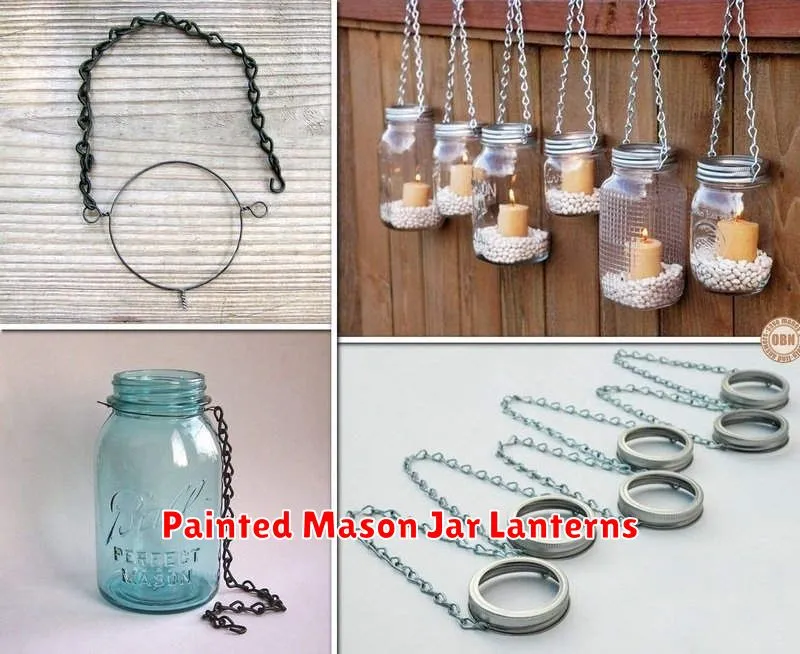
Transform ordinary mason jars into charming outdoor lanterns with a simple DIY project. This requires minimal supplies and offers a significant aesthetic upgrade to your patio or garden. Essential materials include clean mason jars, exterior-grade paint (consider weather-resistant options), a paintbrush, and a sealant (optional, but recommended for longevity). Choose colors that complement your existing outdoor décor.
The process is straightforward. Begin by thoroughly cleaning your mason jars. Once dry, apply your chosen paint in several thin coats, allowing each to dry completely before applying the next. For a more sophisticated look, consider using stencils for designs or multiple colors. Once the paint is completely dry, apply a sealant to protect the paint from the elements and extend the lantern’s lifespan. Allow the sealant to dry before adding a tea light or battery-operated candle.
These painted mason jar lanterns offer a cost-effective and personalized way to illuminate your outdoor spaces. They add a touch of rustic charm and create a warm, inviting ambiance for evenings spent outdoors. The customization options are endless, allowing you to tailor your lanterns to your specific style and preferences. Experiment with various colors, patterns, and finishes to achieve your desired look.
Recycled Tire Planters
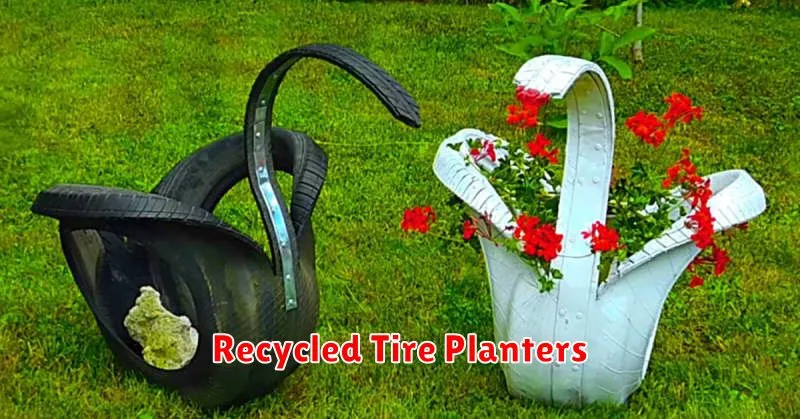
Transform old tires into unique and eco-friendly planters for your outdoor space. This DIY project offers a cost-effective way to add a touch of greenery while promoting sustainability. The process involves cleaning the tires thoroughly, preparing them for planting (potentially by adding a layer of landscaping fabric to prevent soil leakage), and then adding soil and your desired plants.
Creativity is key when designing your tire planters. Consider painting the tires vibrant colors, stacking them vertically to create tiered planters, or even incorporating other recycled materials such as wood or metal for added visual appeal. The possibilities are endless, allowing for personalized expression in your garden design.
Beyond the aesthetic benefits, using recycled tires contributes to environmental conservation by diverting waste from landfills. This simple upcycling project demonstrates a commitment to sustainability while simultaneously enhancing your outdoor living space with beautiful and functional planters.
DIY Wooden Pergolas
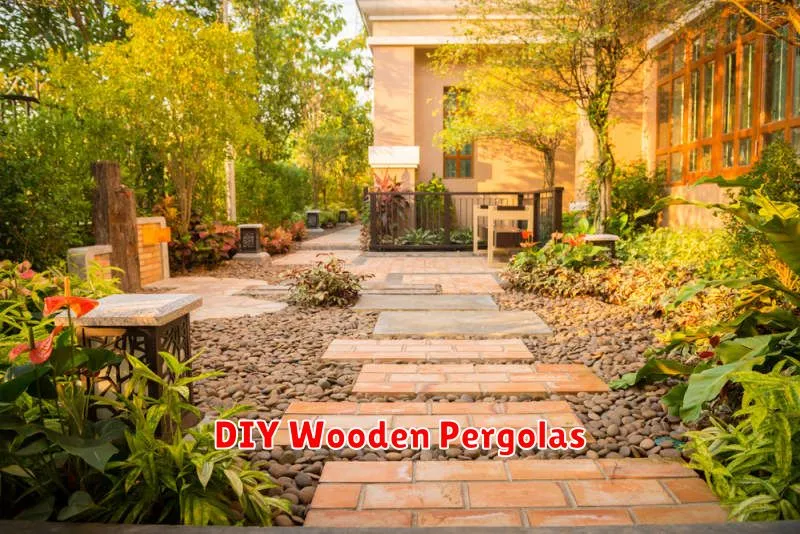
Building a DIY wooden pergola is a rewarding project that can dramatically enhance your outdoor space. It provides a shaded area for relaxation, adds architectural interest, and increases the overall value of your property. With careful planning and execution, even novice DIYers can achieve impressive results.
The key to a successful pergola construction lies in proper planning and material selection. Begin by creating detailed plans, including measurements and a materials list. Choose durable, weather-resistant wood like cedar or redwood. Invest in high-quality hardware and tools to ensure a strong and aesthetically pleasing structure. Consider incorporating design elements that complement your existing landscaping and home’s style.
Construction involves erecting four corner posts, attaching beams across the top, and adding rafters for shade. Careful attention to leveling and securing each component is crucial for structural integrity. Once the framework is complete, you can personalize your pergola with climbing plants, outdoor lighting, or other decorative elements to create your own unique outdoor oasis. Remember to obtain any necessary building permits before starting your project.
Upcycled Bottle Borders

Transform discarded glass bottles into a unique and charming border for your garden beds or pathways. This eco-friendly DIY project requires minimal tools and materials. Clean and thoroughly dry your collected bottles. Remove any labels and then, using appropriate safety measures, carefully cut the bottles into uniform sections, aiming for a consistent height. You may need a bottle cutter or a glass scoring tool for a cleaner cut.
Once the bottle sections are prepared, decide upon the placement and design of your border. You can create a straight line, a curved design, or even incorporate patterns. Consider the size and shape of your garden bed or pathway for optimal aesthetic appeal. Dig a shallow trench along your chosen border line, and then carefully insert the bottle sections into the trench, ensuring they are firmly seated.
Finally, fill in the trench with soil, gently tamping down to secure the bottle border in place. This simple project adds a touch of rustic elegance and sustainability to your outdoor spaces, offering a cost-effective and visually appealing alternative to traditional garden edging. Remember to wear protective eyewear and gloves throughout the process to prevent injuries from broken glass.
Driftwood Candle Holders

Transform ordinary driftwood into elegant candle holders for a charming, coastal aesthetic in your outdoor spaces. This DIY project requires minimal tools and materials, making it a perfect weekend undertaking. Simply select pieces of driftwood with interesting shapes and sizes, ensuring they are clean and dry.
To create the candle holders, carefully drill holes of appropriate size into the driftwood to accommodate your chosen candles. Consider using a drill bit slightly smaller than the candle diameter to ensure a snug fit. For added stability, you might wish to add a small amount of adhesive to secure the candles within the holes. Sand any rough edges for a smoother finish.
Finally, arrange your driftwood candle holders strategically throughout your outdoor area. They provide a warm, inviting ambiance, particularly during evening gatherings. Their natural, rustic appeal complements a variety of outdoor settings, from patios and decks to gardens and walkways. This simple project offers a significant aesthetic upgrade with minimal effort.
Vertical Pallet Gardens
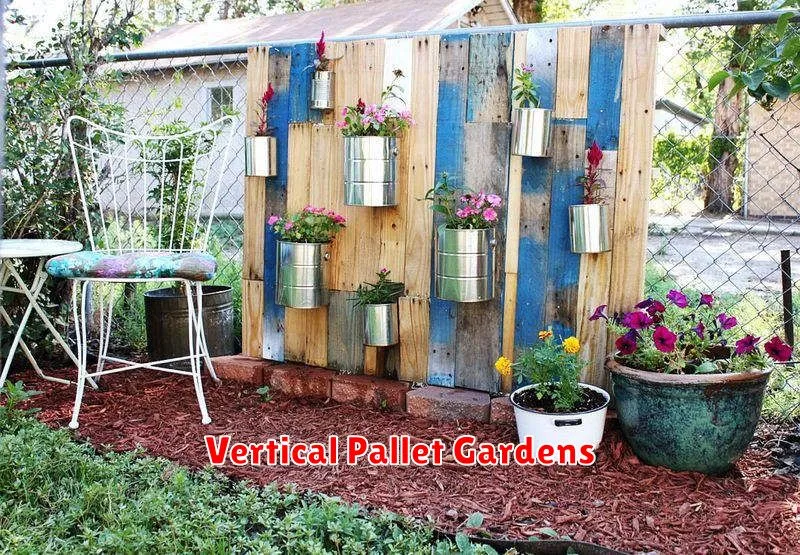
Transform your outdoor space with a vertical pallet garden, a stylish and practical DIY project. Using reclaimed wooden pallets, you can create a unique and visually appealing vertical garden that maximizes space and adds a touch of rustic charm. The project requires minimal tools and materials, making it accessible for beginners.
Construction involves cleaning and prepping the pallet, ensuring it’s sturdy and free of splinters. Then, create planting pockets using fabric liners, plastic containers, or even by filling gaps between the slats with soil directly. Choose plants suitable for vertical growth and consider the amount of sunlight your chosen location receives.
Benefits of a vertical pallet garden include space optimization, improved aesthetics, and a sustainable approach to gardening. The project promotes eco-friendly practices by reusing materials and allows for creative expression through the selection of plants and their arrangement. Enjoy the rewarding experience of creating a beautiful and functional addition to your outdoor area.
Hanging Herb Planters
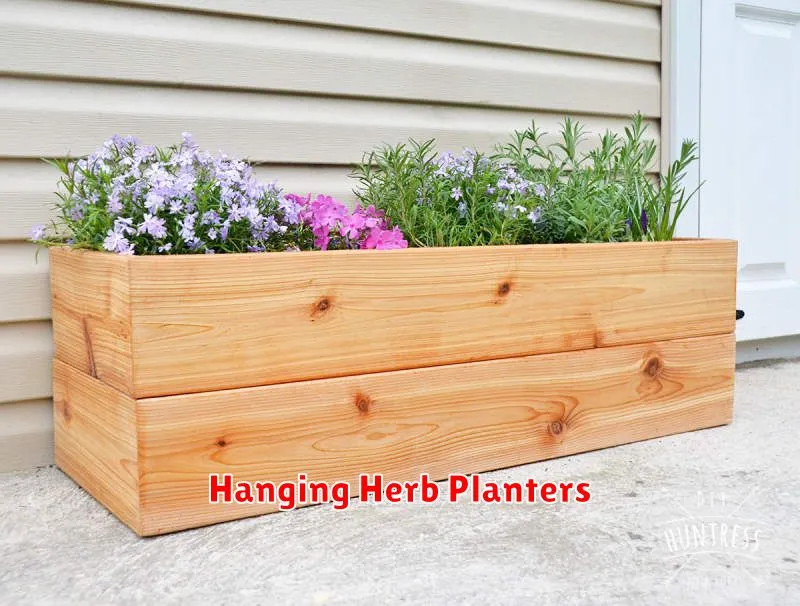
Transform your outdoor space with charming and functional hanging herb planters. These DIY projects offer a simple yet elegant way to add greenery and fresh herbs to patios, balconies, or gardens. Materials are readily accessible, often including repurposed items like old cans, teacups, or even mason jars, minimizing cost and environmental impact.
The process is surprisingly straightforward. Basic instructions typically involve cleaning and preparing your chosen container, adding drainage holes if necessary, and filling with suitable potting soil. You can then plant your favorite herbs, ensuring proper spacing for growth. A simple hanging mechanism, such as sturdy rope or chains, completes the project.
The benefits extend beyond aesthetics. Hanging planters maximize space, especially in smaller outdoor areas. They also improve air circulation, reducing the risk of fungal diseases in your herbs. With a little creativity and effort, you can create personalized hanging herb planters that enhance both the beauty and functionality of your outdoor spaces.
Handmade Stone Pathways

Creating a handmade stone pathway is a rewarding DIY project that significantly enhances your outdoor space. This project allows for creative expression, enabling you to choose stones in various shapes, sizes, and colors to complement your existing landscape. The process involves careful planning, including mapping out the pathway’s design and ensuring proper drainage. Essential tools include a shovel, tamper, and level for precise placement.
The initial step involves excavating the pathway area to a suitable depth. Then, a base layer of compacted gravel ensures proper drainage and stability. The selected stones are then carefully placed onto this base, ensuring even spacing and a secure fit. Using sand as a filler between the stones helps to lock them in place and prevent shifting. Finally, compact the entire pathway using a tamper to achieve a firm, even surface.
A handmade stone pathway provides a durable and aesthetically pleasing addition to any garden or outdoor area. The project’s relative simplicity and the ability to personalize the design make it an ideal choice for DIY enthusiasts. With a little patience and planning, you can create a beautiful and functional pathway that adds considerable value to your property.
Eco-Friendly Compost Bins
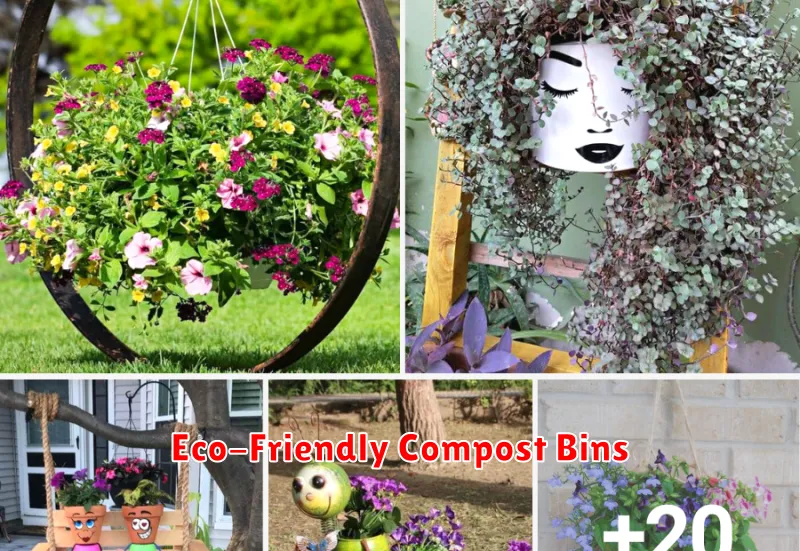
Transform your yard waste into valuable compost with a DIY eco-friendly bin. Building your own compost bin offers a sustainable alternative to purchasing pre-made options, reducing your environmental impact. Using readily available materials such as pallets, wire mesh, or even repurposed barrels minimizes waste and allows for customization based on your space and needs. This simple project promotes responsible waste management and enriches your garden soil naturally.
The construction process is straightforward and adaptable. For a three-bin system, consider using pallets for the structure, allowing for easy separation of materials at different stages of decomposition. Alternatively, a single-bin design using wire mesh provides excellent ventilation. Remember to choose a location with adequate shade and access to water for optimal decomposition. Proper bin design ensures efficient breakdown of organic matter.
Beyond the environmental benefits, crafting your compost bin offers a rewarding experience. The project allows you to tailor the size and design to suit your garden’s needs and personal aesthetic. Utilizing recycled materials adds a unique touch, promoting sustainability while fostering a deeper connection with your outdoor space. The resulting compost will significantly improve soil health, reducing the need for chemical fertilizers, further bolstering your eco-friendly gardening efforts.
Solar-Powered Light Fixtures
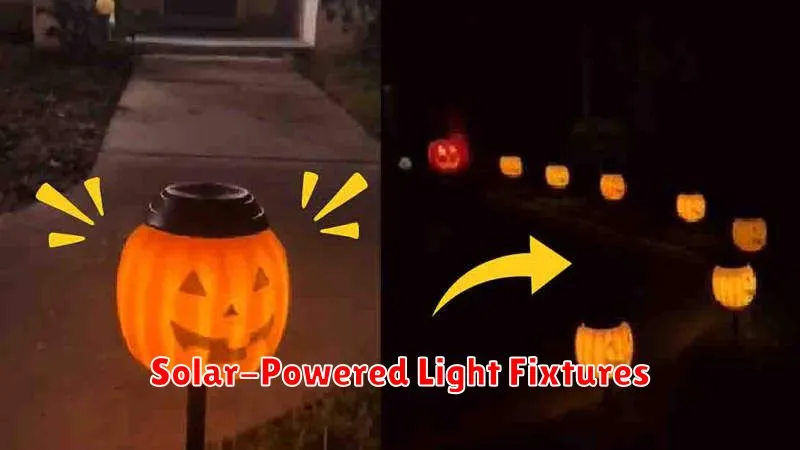
Transform your outdoor spaces with DIY solar-powered light fixtures. This eco-friendly and cost-effective project offers a sustainable way to illuminate pathways, patios, or gardens. Numerous designs are achievable, ranging from simple repurposed jars to more intricate creations using readily available materials.
The process typically involves sourcing solar panels, LED lights, and a suitable housing. Careful consideration should be given to the size and wattage of the components to ensure adequate brightness and battery life. Basic electrical skills are necessary for wiring and assembly, but numerous online tutorials offer guidance for all skill levels.
By creating your own solar-powered light fixtures, you’ll enjoy energy savings, reduce your environmental impact, and add a unique, personalized touch to your outdoor environment. The aesthetic versatility allows for integration with any existing landscape design, enhancing its beauty and functionality after dark.